|
12/25/2021 Comments Publish an Angular Library into NPM A Front End application is comprised of the code we write, and also by many 3rd party packages. The very first packages we download are those from @angular and have to do with the CLI and the framework itself. The packages live in the NPM registry (more articles will follow with alternatives) and our SPA defines the dependencies on those packages either using yarn, npm, or pnpm. We can create and publish a library into the NPM either for sharing with other developers a cool package we developed, or to upload a library so that we can re-use it by our applications (poly-repo) as we see in the figure below. 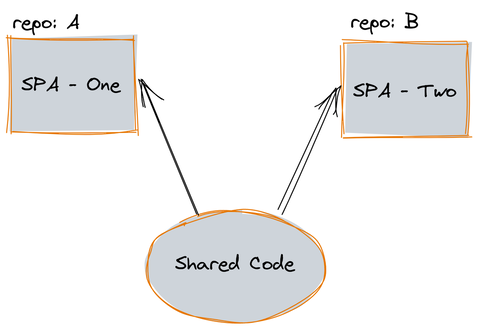 Create an Angular library
This command will result in a filesystem like the following: Code Editor
This command will result in a filesystem like the following: If we expand the /src directory, we will see: Inside the /src/lib directory we can create any file we want (service, component, directive, etc) which is part of our library. The public-apiWe need to focus a bit on the file public-api. When we create a library, we define an API of how this library will be used by other apps. We might have in our /src/lib directory many files, but a few of them are part of our API. So, in the public-api directory, we define only those files that are part of our API. To better illustrate this, let's see a short example. In a parent-child component pattern, the parent knows how to use the children component, and as such in the public-api we export only the parent component and not the children. Build The Angular Library
This will generate a /dist directory with the compiled version of our library. The filesystem will look something similar to the following: Create an NPM account
Login in your workspace
Publish your library
You did it!! You've created your first NPM package. If you visit the NPM page, click on your avatar, then click on Packages and you will see your published package! Thanks for reading my article. If you prefer a video, you can find one in my YouTube channel
Comments
|
AuthorI am an Angular GDE, content creator who loves sharing knowledge TagsAll Angular Angularjs General Graphql Ionic Javascript .net Nodejs Typescript |

Proudly powered by Weebly